The Best Spackle for Repairs Around the Home
Photo: amazon.com
Even the strongest walls in a home will inevitably take a beating over the years, leaving pinholes from picture-hanging nails or gashes from furniture. While repairing a hole in a wall may seem like a daunting job, it’s actually one of the easier DIY repairs—but only if one uses the right spackle.
Spackle is a putty with a toothpaste-like consistency that can fill everything from a tiny nail hole to a 6-inch-wide crater when used with a mesh patch. These products dry in as little as 30 minutes, making wall and ceiling repairs a fairly quick job. This guide will explore the different types of spackles and review some of the best spackle choices on the market.
Photo: amazon.com
What to Consider When Buying the Best Spackle
There are a few things to consider when choosing the best spackle for a repair job, including texture, drying time, flexibility, and which type of spackling compound is best suited to tackle which repairs.
Understanding the different types of spackles on the market is key to selecting the right spackle for the job. Spackle comes in lightweight, standard, vinyl, epoxy, and acrylic varieties.
Different spackles are capable of covering different size holes and gashes. While not all manufacturers list the size of the repair the spackle can handle, knowing the type of spackle will give a good indication of what kinds of repairs it will cover. This is crucial to ensuring that the repair holds up once the spackle is dry.
While lightweight spackles are best suited to small nail holes and gouges of ¼ inch or less, standard spackles and heavier spackling compounds can cover gaps and depths of up to ¾inch. Filling these larger holes usually requires the user to apply a series of layers, allowing each layer to dry between applications.
Larger holes of an inch or more in diameter require the use of a mesh patch. Standard and vinyl spackles are best suited for this type of repair.
Spackle comes in two types of finishes: textured and smooth. Choose a texture that best matches the material of the wall. Spackle for drywall will dry to a rougher textured finish that blends better with the drywall surface once the repair and painting are complete. Spackles designed for plaster, in comparison, will have a smoother finish that matches the texture of plaster walls.
Drying time is an essential aspect of spackling, as it typically precedes a paint job. Spackles with quick dry times allow the user to get on to the main job of painting sooner. Lightweight spackles typically have shorter dry times, with many ready to receive paint just 30 minutes after application. Some lightweight spackles turn from pink to white as they dry, making it easier to identify when the spackle is ready for sanding and painting.
Heavier vinyl and acrylic spackles, by comparison, can take from 1 to 5 hours to dry, depending on how thick the repair is. Keep in mind that temperature and humidity can affect the drying process. Humid conditions and temperatures below 40 degrees will extend the necessary drying time.
Flexibility is a crucial characteristic of spackling, depending on the type of material the spackle is covering. Spackles made for drywall are typically not as flexible as vinyl and acrylic spackles designed for masonry. Drywall is a stable surface that is not affected by changing temperatures, whereas brick, concrete, and other masonry expand and contract with temperature changes. The spackle must be able to expand and contract with those surfaces to prevent cracking and chipping.
Once dry, spackle is porous, causing it to suck up the moisture in paint, which may hurt the paint’s ability to cover. With this in mind, one should prime spackle before painting it. For water-based spackle, use a water-based primer. Likewise, oil-based spackles like epoxy require an oil-based primer. Some spackles come with primer mixed in with it. This type of spackle is ready to receive paint as soon as it dries, eliminating the need to prime it before painting it. Some spackles don’t even require sanding.
Our Top Picks
The list below includes spackles with quick dry times for minor prepainting repairs and heavy-duty compounds that are well suited for repairing larger holes and gashes. Any of the spackle products below are effective for making repairs to walls and ceilings.
1Photo: amazon.com Check Latest Price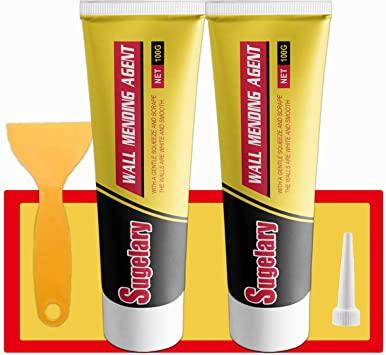
With a versatile formula and a color-changing quality that makes it easy to tell when it’s dry, this product is one of the best all-around spackles on the market. DryDex can cover everything from small nail holes to large gashes that require a mesh patch. While determining when some spackles are dry can be a challenge, DryDex makes it easy: It’s pink when applied and turns to a solid white when dry.
DryDex also won’t shrink or crack, reducing the number of coats needed to complete the job. Once white, it sands easily. And with primer integrated into the spackling, there’s no need to prime before painting over it. DryDex, which comes in ½-pint, 5-ounce, and quart-size containers, is suitable for use on drywall, plaster, and wood, making it an excellent spackle to have on hand for repairs in a pinch.
2Photo: amazon.com Check Latest PriceWith its 32-ounce bucket, this spackle offers the same high level of quality as other DAP products at a very similar price, making it an ideal pick for larger wall-repair jobs. This standard spackling compound is versatile with its ability to fill small nail holes or larger cracks and holes.
It dries within a few hours, depending on the thickness of the repair, and is suitable for use with various materials, including drywall, wood, masonry, and metal. With its resistance to cracking and shrinking, it requires a single application for repairs of ¼ inch or less. It can also fill holes of up to ¾ inch when layered.
3Photo: amazon.com Check Latest Price77No one wants to wait an hour or more for that spackled nail hole from the picture hanger to dry so the painting project can get underway. This DAP Fast’N Final LIghtweight Spackling is ideal for such minor prepainting repairs. It goes on quickly with a putty knife and is ready for paint in just 30 minutes.
With no sanding or priming required, this spackle is one of the fastest ways to get those minor wall repairs done so the painting can begin. This spackle dries to a hard finish and won’t shrink or crack. DAP Fast’N Final comes in a variety of sizes, including a small 8-ounce unit that’s easy to grip in one hand while applying it with a putty knife in the other. 777
4Photo: amazon.com Check Latest PriceMore extensive wall and ceiling repairs require a spackle with a heavier consistency. This high-strength spackle from 3M uses fibers in its mix to create a thicker compound that is capable of patching holes between 3 and 5 inches in diameter. Those fibers also give it exceptional strength, enabling this spackle to hold its shape through the drying process while also ensuring a strong patch that will hold up to daily wear and tear once dry.
Its thicker consistency also makes it ideal for sanding. With a dry time as short as 30 minutes, depending on thickness, this spackle dries five times faster than other vinyl spackles. It’s suitable for outdoor use when sealed with paint and works on drywall, plaster, stucco, concrete, and wood.
5Photo: amazon.com Check Latest PriceA quick dry time, convenient packaging, and an easy-to-apply formula make this spackle from 3M an ideal option for making quick wall repairs. It’s suitable for repairing holes up to 3 inches in diameter and dries in under an hour. It also resists shrinking, cracking, and sagging, eliminating the need for multiple coats in most cases. And it has a primer mixed into the compound, so it’s ready for painting immediately after it dries.
The spackling comes in a small tub that one can comfortably grip in one hand, convenient for making quick repairs on walls and ceilings. It dries in as little as 30 minutes to a hard finish that’s tough enough to hold screws and nails. 3M High Strength Small Hole Repair comes in 8-, 16-, and 32-ounce containers.
6Photo: amazon.com Check Latest PriceWhile most spackling repair kits come with spackling and patches, this four-piece kit goes the extra mile by also including a putty knife and sandpaper. With all the necessary tools for repairing walls and ceilings, this kit is ideal for anyone who needs to fix damaged walls or ceilings in smaller houses and apartments, but who may not have a workshop with a collection of tools and supplies at the ready.
This kit includes a 6-inch by 6-inch patch for repairing larger holes, a putty knife for easy application of the compound, and a piece of 220-grit sandpaper for sanding the repair to a smooth finish once dry. With a quick drying time of about an hour, this spackle kit is ideal for fast repairs.
7Photo: amazon.com Check Latest PriceThis spackling dries to a waterproof solid and is compatible with various building materials, making it an excellent option for outdoor repairs. Whereas other exterior spackles require a coating of paint for protection, DAP Platinum is fully waterproof 24 hours after application. It resists mold and mildew growth as well as the damaging UV rays of the sun.
With its ability to adhere to metal, PVC, wood, masonry, vinyl, and virtually any other material found on a home’s exterior, this vinyl is an excellent option for various exterior repairs. DAP Platinum is also easy to conceal once the repair is dry, thanks to its sandable and paintable finish. It comes in a 16-ounce tub.
FAQs About Spackle
For those still wondering about how spackle works, read on for answers to some of the most common questions about this wall- and ceiling-repair product.
As long as it isn’t inhaled in large amounts, spackle is generally not harmful. That said, it’s still important to wear a mask when sanding spackle, as inhaling the dust particles can irritate the throat and airway.
Water can ruin a spackle patch when it is bare and unpainted, unless it is a waterproof spackle patch. If working outdoors, make sure to check the weather to ensure it doesn’t rain before the patch has had a chance to dry and receive a coat or two of exterior paint.
Use a joint compound in place of spackle in a pinch, but don’t use spackle for projects that require a joint compound. Spackle is drier and more paste-like than a joint compound, making it an unsuitable replacement.
While lightweight spackle can dry in as little as 30 minutes, most spackle takes between 1 and 2 hours to dry. Some dry times may be longer or shorter, depending on the thickness of the spackle.
Yes. In fact, in most cases, sanding the spackle after it’s dry is necessary to ensure it is level with the surface of the wall or ceiling.
While priming minor nail-hole repairs is unnecessary, larger repair jobs require a coat of primer before painting. Spackle is very porous, which can cause it to suck the moisture out of the paint, resulting in inadequate coverage that causes the repaired area to show through the paint. Unless the spackle comes combined with primer, prime the surface before painting it.
Yes, but make sure to store it properly. Spackle will dry very quickly when exposed to air and heat, so be sure to seal the lid tightly immediately after use. Store the spackle in a cool place, such as a basement, and never leave the container in direct sunlight.

