How To: Stretch Carpet
If your wall-to-wall begins to bunch, wrinkle, or otherwise come up short, try this strategy to restore its looks, comfort, and safety.
ByJenniferNoonan andBobVila | Updated May 31, 2021 10:29 AM
Photo: dreamstime.com
Even the nicest wall-to-wall carpeting can start to buckle, ripple, or wrinkle over time when it loosens and lifts from the initial adhesive. Sometimes the carpet unfastens due to humidity, other times from improper installation.
Whatever the cause, consider re-stretching your initial investment before you take a nasty fall due to the tripping hazard. Making carpeting taut again isn’t an especially difficult task for the daring do-it-yourselfer. In fact, this project’s most challenging aspect for the average homeowner is that it requires access to two professional tools: a power stretcher and knee kicker.
Connect with a carpet repair proReceive free, no-commitment quotes for your project from trusted carpet repair pros near you. Find a pro+While the power stretcher looks like a mop with sharp teeth (view example on Amazon), it does the bulk of the work when either installing carpet or stretching out any wrinkles over spaces of 10 feet by 10 feet or more. All set up, the power stretcher’s head of teeth hooks through the pile and into the carpet’s backing on one side of the bumps and the base remains positioned on the other. Then, with a press of the handle, the power stretcher extends, pushing the two ends farther apart and stretching the carpet.
A knee kicker (view example on Amazon) possesses similar stretching talents on a smaller scale—perfect for dewrinkling in tight corners and spaces within three feet from the wall. Fortunately for the average homeowner who only looking to fix up a single room, both tools (which together retail upwards of $400) are typically available to rent by the hour or day from your local home improvement store, bringing this ambitious DIY project back to within reach.
Photo: homedepot.com
Tools & Materials We are a participant in the Amazon Services LLC Associates Program, an affiliate advertising program designed to provide a means for us to earn fees by linking to Amazon.com and affiliated sites.Photo: dreamstime.com

Step 1
Remove all furniture from the room. Don’t fret over fixed obstacles, such as built-in cabinets—you can work around them. Then, run a vacuum over the entire carpet; hoovering the excess dirt before you start will limit the amount of dust that shakes free while stretching the carpet.
Step 2
Pull on your work gloves, and free the corner of your carpet from the baseboard tack strip by gently tugging with a pair of pliers. (Work carefully so that you don’t fray the pile fibers too much during the process.) Once you’ve undone enough of the edge for you to grab the carpet, set down your pliers and tug the carpet by hand away from the wall. Work your way along the wall for three sides of the room, leaving one side in place to anchor the carpet.
Beneath the carpet, the pad should lie short of (and not overlap) the tack strip and remain firmly secured to the subfloor. Using the pliers and a flat-head screwdriver, remove any tacks or staples that might secure the carpet to the padding—or a pry bar if they’re stubborn. Again, pull gently so you don’t tear carpet fibers. Leave tack strips in place unless rotten or moldy; otherwise, rip them out using a pry bar angled underneath the setting nails and replace them.
AdvertisementStep 3
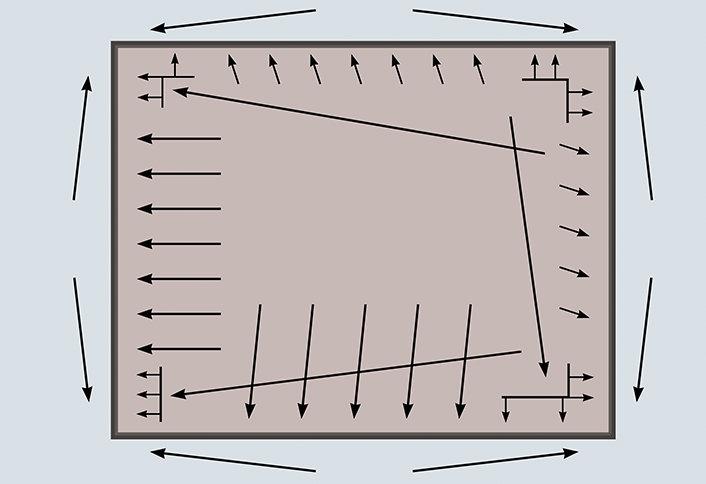
Brace the power stretcher’s base against a short length of 2×4 in front of the wall where the carpet remains attached. (When the power stretcher’s base pushes as its head stretches, the wood will protect your wall and trim.) Lay the machine, tooth-side down, perpendicular to the ripple or ripples. Increase the length of the stretcher’s shaft using extension poles until the head is about 6 inches from the opposite wall. Then, adjust the length of the teeth on the machine’s head via a knob or dial in order to sink them through the pile and into the carpet backing.
Step 4
Press down on the machine’s lever of a handle to extend the head (teeth still gripping the carpeting) as the stretching begins. If it takes herculean effort to push the lever, you’re overstretching the carpet and could damage it. If it’s too easy, you’re not stretching the carpet enough to remove the ridges; adjust the teeth to let go of the carpeting, then lift the head and handle and start over using the appropriate force.
Continue to press the lever until you see the wrinkles disappear. Your carpeting should reach the wall, perhaps even a little further. Press its backing into the tack strip until it holds, and then release the power stretcher’s handle.
Step 5
Depending on how long the ripple is, you may need to reposition the power carpet stretcher a couple of feet to the right or left of where you started. Repeat Steps 3 and 4.
Photo: dreamstime.com
Step 6
If you’re working in a small area or a corner where the power stretcher is too large to use, employ the knee kicker (pictured at right) to finish the job. Press the teeth of this old-school tool into the carpet 6 inches from the wall, and adjust their lengths so that they hook through the pile and into the backing. Then, place your leg just above the kneecap into its padded base, and kick forward. More or harder kicks will push the head forward and effectively stretch the carpet. When you’ve worked out any lumps in your carpet, immediately fasten the section of carpeting to the tack strip.
AdvertisementStep 7
Before you move to the adjoining walls to reattach carpet to the subfloor, use a curved carpet knife or sharp utility knife to trim any amount of carpeting material that extends past the floor. Roll the surplus carpet back toward you and cut a straight line on the backing right about where the wall meets the floor. Be sure to leave enough material to abut or tuck under the baseboard—better to have more length than cut the carpeting too short to reach the wall. A yardstick or straightedge placed atop the carpet can help keep the carpet aligned with the baseboard as you slice.
Step 8
Finally, carefully press the carpeting into the tack strips on both adjoining walls.
Now you’ve got flat, smooth, safe wall-to-wall to welcome you home again. Enjoy!
Connect with a carpet repair proReceive free, no-commitment quotes for your project from trusted carpet repair pros near you. Find a pro+Disclosure: BobVila.com participates in the Amazon Services LLC Associates Program, an affiliate advertising program designed to provide a means for publishers to earn fees by linking to Amazon.com and affiliated sites.


