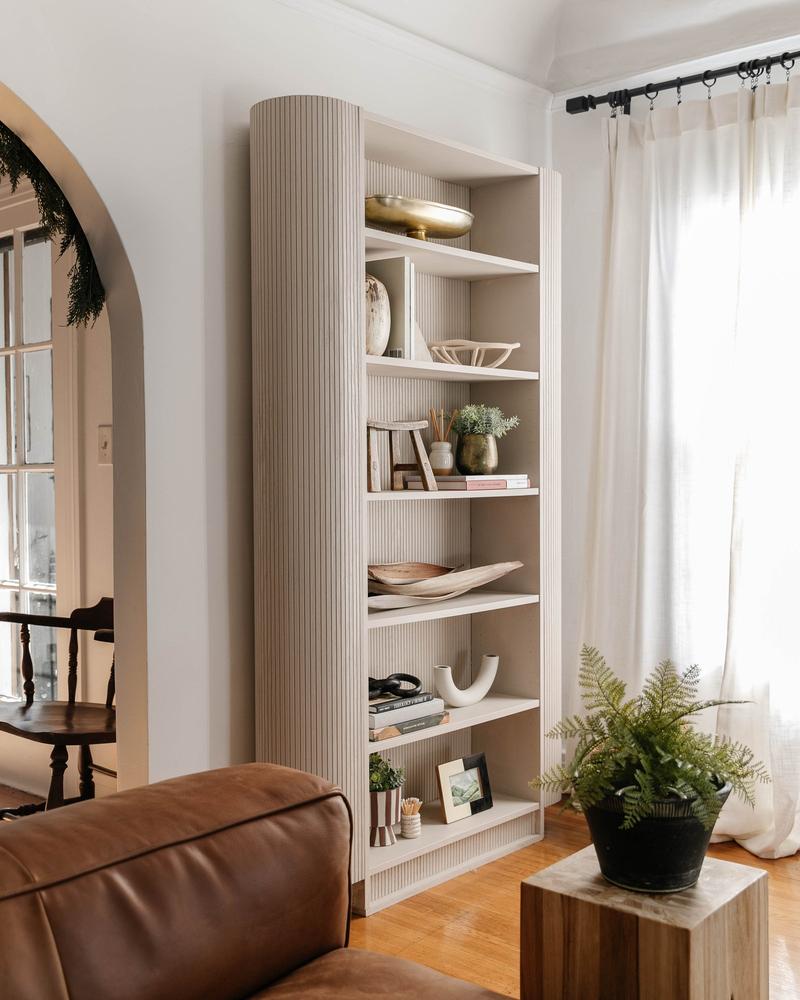
IKEA Billy Bookcase Transformation: Two Experts Share Their DIY Techniques
Step 2: Cut out circle shapes using a jigsaw and a piece of plywood. Cut out four 12-inch circles of wood.
Step 3: Cut those 12-inch circles in half. They’re going to be the bones for the pole wrap.
Step 4: Mount these half circle shapes to the side of the bookcase with L brackets and screws.
Step 5: Wrap the pole wrap and secure it to the half circles with wood glue and a brad nailer.

Step 6: Add the remainder pole wrap to the backing of the bookcase and re-nail to the backside for a slatted finish you can see on the inside.
Step 7: Paint the entire piece one solid color for a cohesive look.
Leonard Bessemer’s IKEA upgrade tips
Get creative: “A good approach when upgrading IKEA furniture is to treat the original as you would a blank sheet of paper or canvas, and your job is to create something new with it. Don’t be scared to go beyond your comfort zone, but also keep in mind what you know and are good at and let that inform your process. You’ll get something that is not only unique but that’s inherently you.”
Lean on paint: “Painting is the easiest and quickest way to dramatically alter a piece. You’ll want to scuff up the surface with 180- or 220-Grit sandpaper so the paint has something to grab on to. You will be fine with any paint, so long as you use a shellac-based primer such as Zinnser B-I-N as your first coat. Shellac pretty much sticks to everything, and everything sticks to it.”
Don’t be afraid to make cuts: “If you want to alter the shape by cutting it, just keep an eye on the hardware connection points. As long as those remain intact you’ll be able to reassemble the piece. If you do end up cutting something you didn’t mean to, you can always drill a small pilot hole and screw it together.”
Embrace tools: “Power tools can be intimidating, but once you get used to them they are pretty simple, and you are more capable than you think you are. Whatever the tool is, watch some YouTube videos, wear eye protection, and practice on scrap material first until you get the feel of it. Lastly, clamp things down—you want the tool or the material to be moving, not both. If I had to pick a few things needed to make my piece, it would be a jigsaw, drill, sandpaper (120-220 Grit), and some wood patch. Jigsaws are great for cutting irregular shapes, not the best for straight lines, but you can get close enough to a straight line if necessary.”


